Configuring Endpoints
Endpoints are individual file storage locations that send or receive files backed by Signiant SDCX Server software or Amazon S3 Storage. The Endpoints page displays a list of your registered endpoints, their type, current status, creation date, location, and software version.
Endpoints can be assigned to Signiant SDCX Servers or Amazon AWS Storage regions.
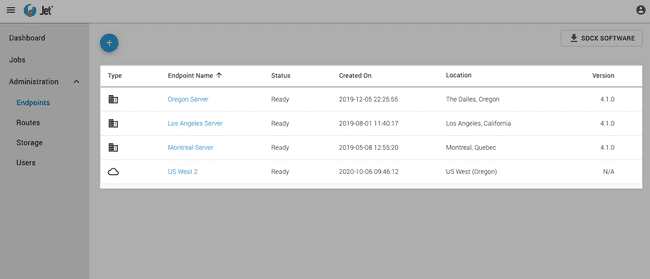
Adding Endpoints
SDCX Servers
Before you can add an on-premises endpoint, you must deploy a Signiant SDCX Server.
Note: If you previously downloaded the SDCX Server software but have not installed it, you must still use a new registration key from the Download SDCX Server Software dialog to install the software on each source or destination server.
Once a server is successfully registered, it can be added as an endpoint.
To add an SDCX Server endpoint:
-
On the Endpoints page, click the Add button.
-
Select On-Premises.
-
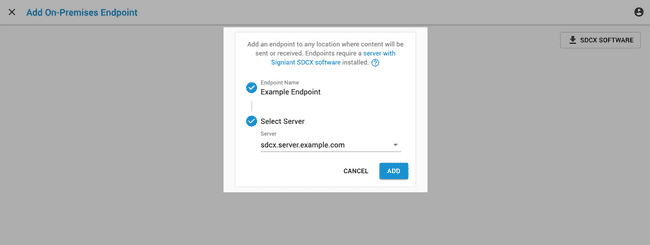
On the Add On-Premises Endpoint page, enter an Endpoint Name.
-
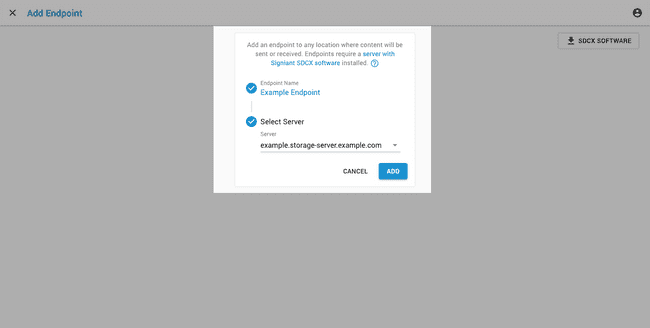
Select an SDCX Server from the drop-down menu.
-
Click Add.
Once an endpoint is added, it can be used to build a route with an on-premises SDCX server or an AWS endpoint.
Note: The same server can be used for more than one endpoint.
AWS Storage
Creating an AWS endpoint allows you to connect cloud storage as a destination endpoint for files transferred from an on-premises SDCX Server.
To add an AWS storage endpoint:
-
On the Endpoints page, click the Add button.
-
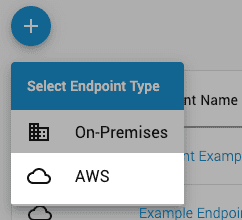
Select AWS.
-
On the Add AWS Endpoint page, enter an Endpoint Name.
-
Select a Region from the drop-down menu.

-
Click Add.
Once an AWS endpoint is created, it can be used to build a route with an on-premises SDCX server.
Viewing Endpoint Details
Once an endpoint is created, view its details by clicking on the endpoint's name on the Endpoints page.
The Endpoint Details page includes a list of the jobs associated with the endpoint and a brief overview of technical details about the endpoint.
Endpoint Job List
The Jobs list shows all jobs currently assigned to that endpoint, including the job name, status, and the last time the job was updated.
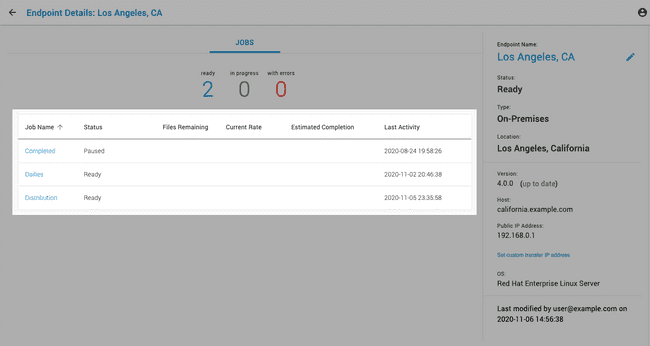
Clicking on a job name displays the job details.
Technical Details
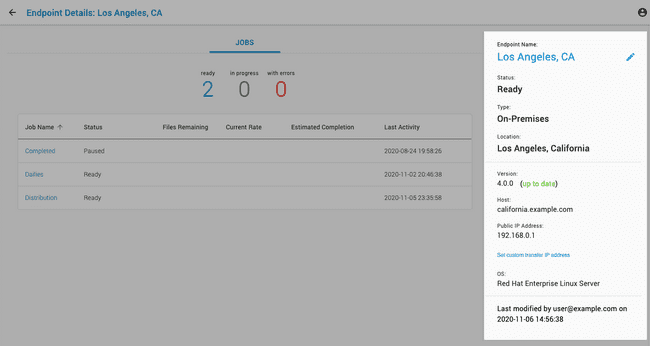
The right panel of the Endpoint Details screen displays information about the endpoint including its name, host, IP addresses, operating system, and server version.
The technical details panel also provides the ability to configure a custom IP address and rename the endpoint for intranet file transfers.
Custom Transfer IP Address
Setting a custom transfer IP address on an endpoint allows you to use a different IP address for transfers. This can include jobs between endpoints on the same private network connected by a route that uses internal IPs to connect. This allows you to transfer files securely between endpoints using their internal IP addresses without exposing endpoints to the Internet.
To configure a custom IP address on an endpoint:
-
On the Endpoints page, click an endpoint name to view its details.
-
In the technical details panel, click Set custom transfer IP address.
-
Enter a custom transfer IP address and click the check mark to save changes.
Once a custom transfer IP address is set, the endpoint will use the custom IP for all its associated jobs.
Note: Endpoints cannot be used for public and custom transfer IP addresses simultaneously. All IP addresses used by the endpoints directed at a particular server must be either public or custom.
Renaming Endpoints
Renaming an endpoint changes the name used to identify it when creating routes and jobs with an endpoint.
To rename an endpoint:
-
On the Endpoints page, click an endpoint name to view its details.
-
In the technical details panel, click the edit icon beside the endpoint name.
-
Rename the endpoint and click the check mark to save changes.
Changing Endpoint Locations
Servers that use a proxy or other networking configurations can list an incorrect location based on its connection to the Internet. Changing an endpoint location allows you to choose a city, region, and country for an endpoint, ensuring a server's accurate location on the dashboard map.
To change an endpoint location:
-
On the Endpoints page, click an endpoint name to view its details.
-
In the technical details panel, click Change endpoint location.
-
Enter a city, region, and country, or select one from the drop-down menu.
To change an endpoint location or to use the default location, click Revert to default to reset the endpoint location, then edit the location again.
Deleting Endpoints
Before you can remove an endpoint, you must delete all jobs associated with the endpoint.
To delete an endpoint:
-
On the Endpoints page, hover over the endpoint you want to delete.
-
Click More Options.

-
Click Delete and confirm the deletion.
Note: When an endpoint associated with a route is deleted, the route becomes invalid and can no longer be used.