Configuring Cloud Storage
Media Shuttle supports cloud object storage with the following vendors:
Note: For information about configuring S3 Compatible storage that is not provided by Amazon AWS, see the S3 Compatible Storage Configuration guide.
Amazon S3 Storage
Media Shuttle can upload to any public S3 bucket using a custom Policy and Role to manage access permissions. Once a Role is created, Media Shuttle can use the Role ARN to provide access to your S3 buckets.
Creating a Policy
To create a Role ARN, you must first create and configure a limited access policy.
-
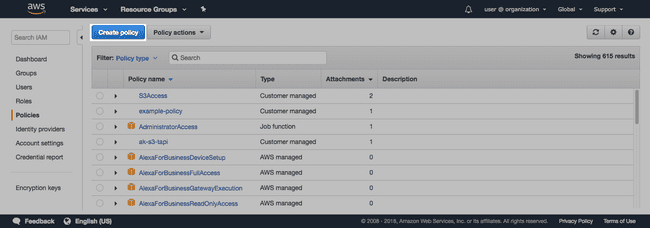
In Amazon AWS, go to IAM and click Policies to open the Policies menu.
-
Click Create Policy.
- In the Policy Editor, click to open the JSON tab.
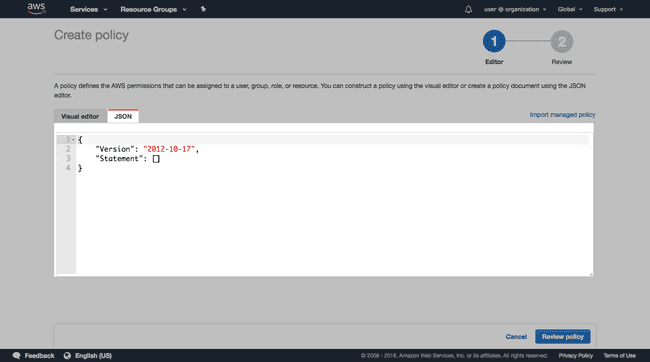
- Copy and paste the following Policy into the JSON code editor:
{
    "Version": "2012-10-17",
    "Statement": [
        {
            "Sid": "SigniantMediaShuttleConsoleActions",
            "Action": ["s3:ListAllMyBuckets"],
            "Effect": "Allow",
            "Resource": ["arn:aws:s3:::*"]
        },
        {
            "Sid": "SigniantMediaShuttleXferEngineActions",
            "Effect": "Allow",
            "Action": [
                "s3:AbortMultipartUpload",
                "s3:DeleteObject*",
                "s3:GetObject*",
                "s3:ListBucket*",
                "s3:ListMultipartUploadParts",
                "s3:PutObject*",
                "s3:GetBucketLocation"
            ],
            "Resource": ["arn:aws:s3:::*", "arn:aws:s3:::*/*"]
        }
    ]
}Note: The SigniantMediaShuttleXferEngineActions in the code sample allows access to all S3 buckets. To specify a single bucket, edit the Resource array and include the bucket name:
"Resource": [ "arn:aws:s3:::BucketName", "arn:aws:s3:::BucketName/*"]-
Click Review policy.
-
Enter a Name and Description for your policy.
-
Click Create Policy.
Note: The policy grants Signiant Media Shuttle the permission to use your S3 buckets for transfers. Modifying the policy can affect Media Shuttle performance.
Creating and Configuring Your Role ARN
-
In Amazon AWS, go to IAM and click Roles to open the Roles menu.
-
Click Create role.

- Select Another AWS account as the trusted entity.
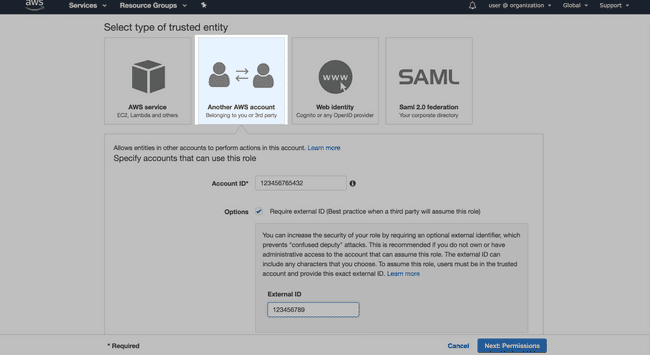
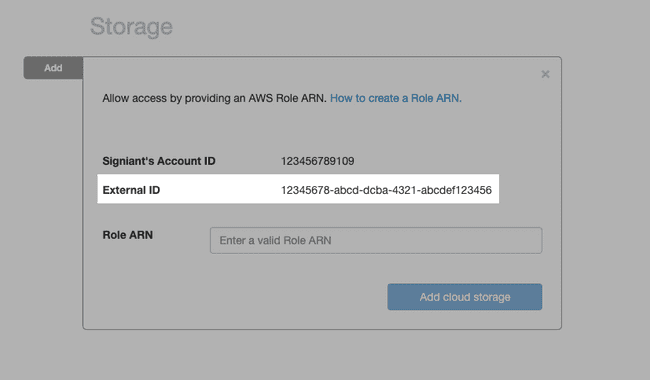
- Enter the Account ID provided in the Media Shuttle IT Administration Console.
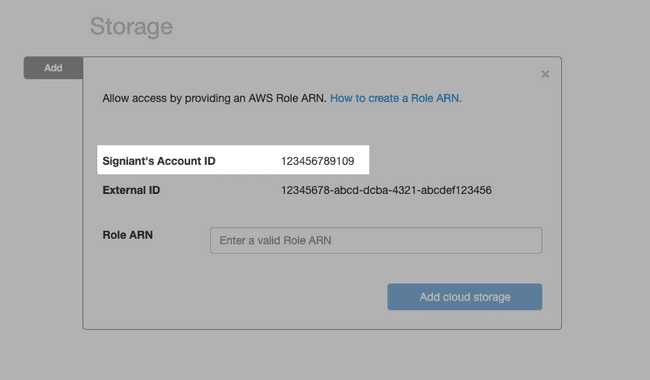
- Enable Require external ID, and enter the External ID provided in the Media Shuttle IT Administration Console.
-
Click Next: Permissions.
-
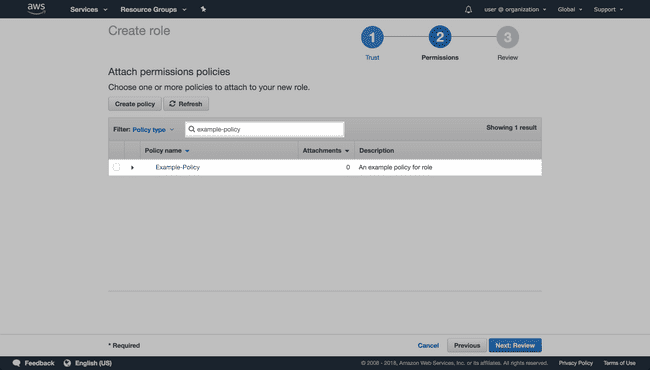
On the Attach Policy page, use the search to filter for the policy and select it using the check box.
-
Click Next: Tags, followed by Next: Review.
-
Set a Name and Description for the Role ARN.
-
Click Create Role.
After creating the role, open its summary via the Roles page, copy the Role ARN to your clipboard, and paste it in the required field in your Media Shuttle IT Administration Console.
Once the Role ARN authenticates Media Shuttle with AWS, select an available bucket from the drop-down menu.
Microsoft Azure Blob Storage
To connect your Media Shuttle account to Microsoft Azure Blob Storage, you must provide an Account Name and Access Key to your connect your Azure account.
Access keys can be created and regenerated from the Access keys page in the Azure portal. Click Show keys to display key values.

Copy and paste the account name and access key to your clipboard and paste them in the Account and Key fields in Media Shuttle. Once you have entered valid credentials into Media Shuttle, select a container from the drop-down menu, and specify a directory if required.
For more information on generating an access key, see Microsoft Docs.
Google Cloud Storage
Generating a Service Account Key
In order to transfer files to and from Google Cloud Storage, you must create a Service Account. Create the account using the Google Cloud Console, by navigating to IAM & Admin > Service Accounts.
Create a new Service Account with Storage Admin and Storage Object Admin account permissions.
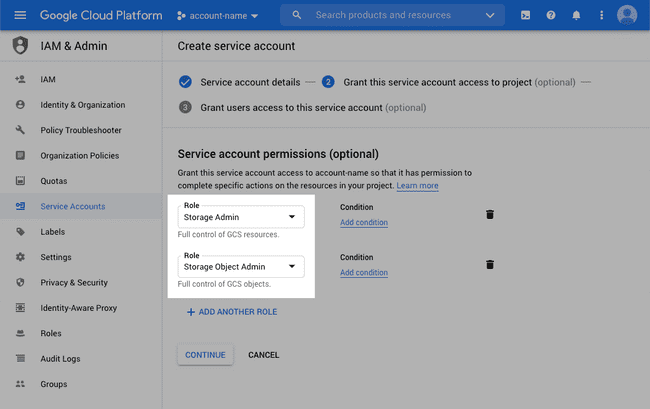
Once you have created a storage account, create and download the Service Account Key from the Service accounts list in JSON format.
Create a Google Cloud Storage location in the Media Shuttle IT Admin console, and upload the key using the Browse button.
Once the key validates, select a bucket from the drop-down menu, and specify a directory if required.
For more information about service accounts, see the Google Cloud Documentation.